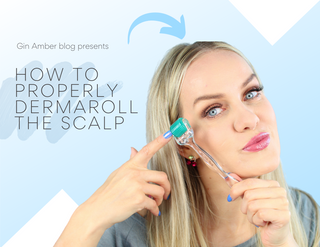
Welcome my Gin Amber babies to another fun and informative blog post where I’ll be revealing the proper way to dermaroll your scalp. Now I touched on this topic a couple blog posts ago about the benefits of dermarolling for hair loss, which is packed full of informative goodies, so if you’re itching to get some backstory, you can check out that blog post here.
What Are the Benefits of Scalp Dermarolling?
Longer, thicker, hair with more volume. Dermarolling the scalp takes all of five minutes a day and the results are incredible, not to mention the best part being that this practice is actually backed by science. That’s right, microneedling has been involved in several case studies for hair loss, where its efficacy when applied on the scalp surpassed that of minoxidil in just three short months. I give a brief overview of what minoxidil is and what it does in my blog post 'How to Dermaroll for Hair Loss".
So, What's the Technique?
Now there are a couple different ways to dermaroll your scalp and neither take longer than five minutes of your time to complete. I don’t usually use a numbing cream (although this is optional), nor do I apply any ointments or post-application products afterwards (though aloe vera is a popular choice and still, entirely optional).
I normally dermaroll on freshly washed hair, because it’s still a little damp, and this facilitates dermaroller movement. Extremely dry hair will cause the dermaroller to catch onto follicles and yank your beautiful locks from the root, so that’s something we'd like to avoid. First, place your hair into a tight ponytail; we want the hair all running the same direction so that it’s easily parted for our microneedling activities. See below.

For size, we’re going to be starting with a 0.5mm dermaroller, but if you’ve been doing this for a while and have already started to reap the benefits of thicker hair, feeling the 0.5mm might be a problem, so advancing to a 0.75mm is perfectly fine. Don’t forget to disinfect the dermaroller prior to usage. I show you how to do that here. And don't forget that my very own Gin Amber 192-real needle dermaroller is going to give you the high quality results you deserve compared to other brands that use fake needles, which can lead to ugly scarring and skin-tugging; a staple of these other false options on the market.
Now you’ll want to press and roll the dermaroller in the direction that your hair flows, with not more than five to ten rolls in one spot and in the same direction before progressing to the next section.
After this, you’ll want to lose the ponytail and part your hair down the middle, so that we can dermaroll back and forth across the scalp. Again, not exceeding five to ten rolls in any given location on the scalp, we’re going to continue sectioning the hair and repeating these steps until we’ve covered the entire scalp with dermaroller application (this includes the sides and back, not just the top).
And voila! It really is that simple. Again, you don't need to apply anything post-dermaroller, but aloe vera is always a safe option.
I hope you enjoyed this blog post and if you need a visual guide, please don't hesitate to check out my channel, including this video, where I show you step-by-step how to dermaroll the scalp the right way: How I Dermaroll the Scalp.
Thicker, stronger, longer hair. It's within reach, and with only a quick, five-minute session in the morning or before bed, you too can attain lustrous, fuller hair that gets you noticed.
Again, thank you my Amber Babies for tuning into another blog post and a humongous thanks to all for my additional subscribers and viewers for the extra love and support! Be well and good luck on your hair growth journeys! Until next time!

Nina
Can I do this before bed and sleep on my scalp?
Elsa
How often do you dermaroll for hair growth?